Today we will see how to install WordPress in Oracle Cloud (OCI).
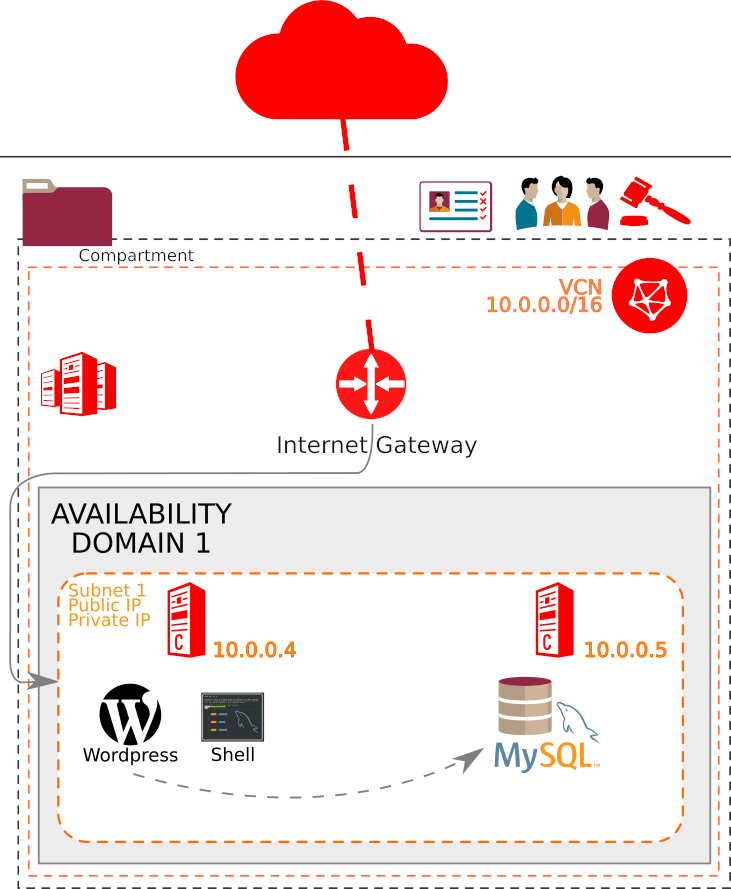
We will use Oracle Cloud’s Free Trier and deploy 2 compute instances:
- the webserver (apache, PHP and WordPress)
- the database server (MySQL 8.0)
We will use one public IP to reach our site and our two servers will communicate using their own private network:
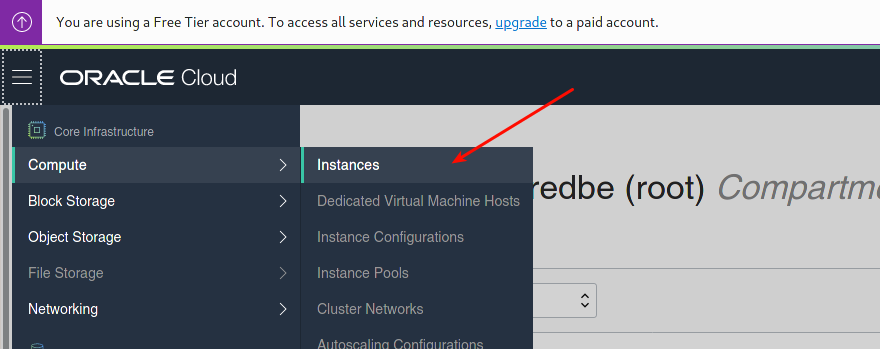
Deploying 2 compute instances
Let’s start by creating 2 compute instances:
We will use the Oracle Linux 7.7 on Micro Instances:
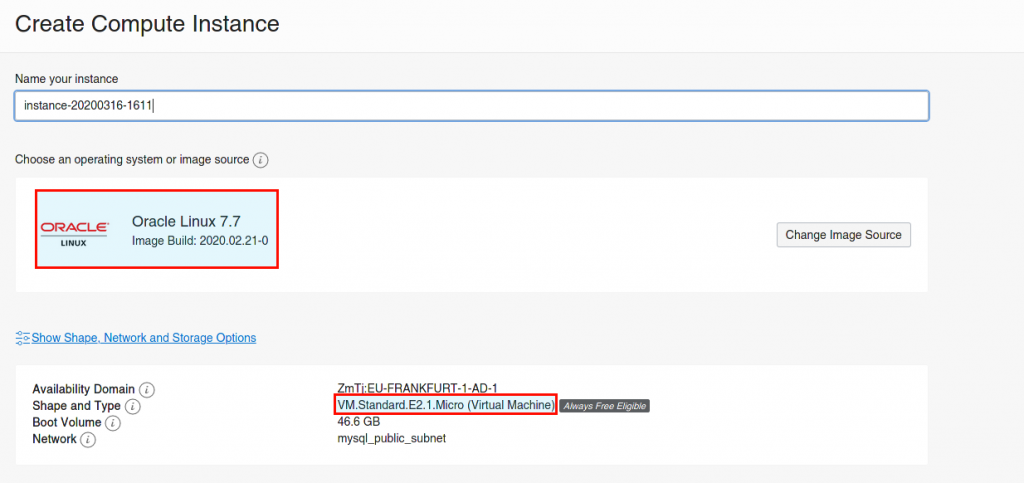
As I am in Belgium, I use the Frankfurt datacenter.
When our instances are deployed, we can find the public IP of one of them. This is the one we will use as webserver (you can free the public IP on the other one, the MySQL one):

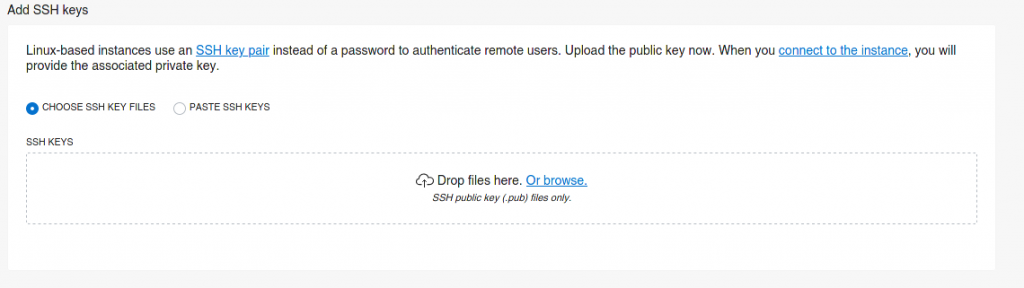
At the creation, we entered a ssh key to access our instances. We will start installing the webserver.
Installing the Webserver
To connect in ssh, we need to use the opc user with the ssh key we added, something like:
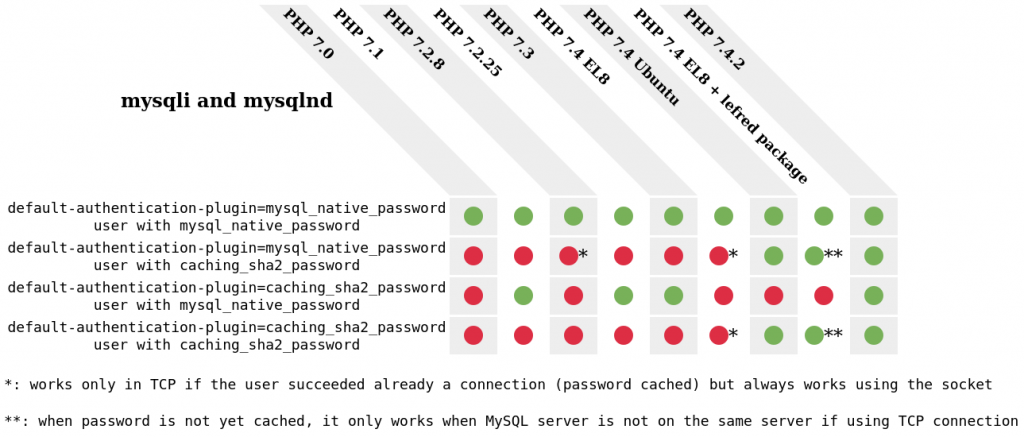
ssh -i ~/.ssh/id_rsa_oci opc@130.61.161.27As we want to use PHP for WordPress and connect to MySQL 8.0 using the new default secure authentication plugin, auth_plugin_caching_sha2_password, we need to install PHP >= 7.4.2
Installing PHP 7.4
To install latest PHP 7.4 we will use EPEL and Remi’s repository:
sudo yum -y install https://dl.fedoraproject.org/pub/epel/epel-release-latest-7.noarch.rpm
sudo yum -y install https://rpms.remirepo.net/enterprise/remi-release-7.rpm
Let’s enable remi’s PHP 7.4 repository:
sudo yum-config-manager --enable remi-php74And finally install all required packages (I used a list of some that I usually need with WordPress):
sudo yum install php php-cli php-mysqlnd php-zip hp-gd \
                 php-mcrypt php-mbstring php-xml php-json
Let’s verify that MySQL is supported with all the authentication methods:

Perfect ! We could also see that as dependency, yum installed apache (httpd).
Installing WordPress
We will install WordPress as the default site as this will be the only site hosted in this micro instance:
[opc@mywordpress ~]$ cd /var/www/
[opc@mywordpress www]$ sudo wget https://wordpress.org/latest.tar.gz
We can unpack it and replace the html folder by the wordpress one:
[opc@mywordpress www]$ sudo tar zxvf latest.tar.gz
[opc@mywordpress www]$ sudo rm -rf html/ latest.tar.gz
[opc@mywordpress www]$ sudo mv wordpress html
[opc@mywordpress www]$ sudo chown apache. -R html
Open port 80
It’s time to configure OCI to open port 80 on our webserver and then configure the local firewall of our instance to allow connections to port 80.
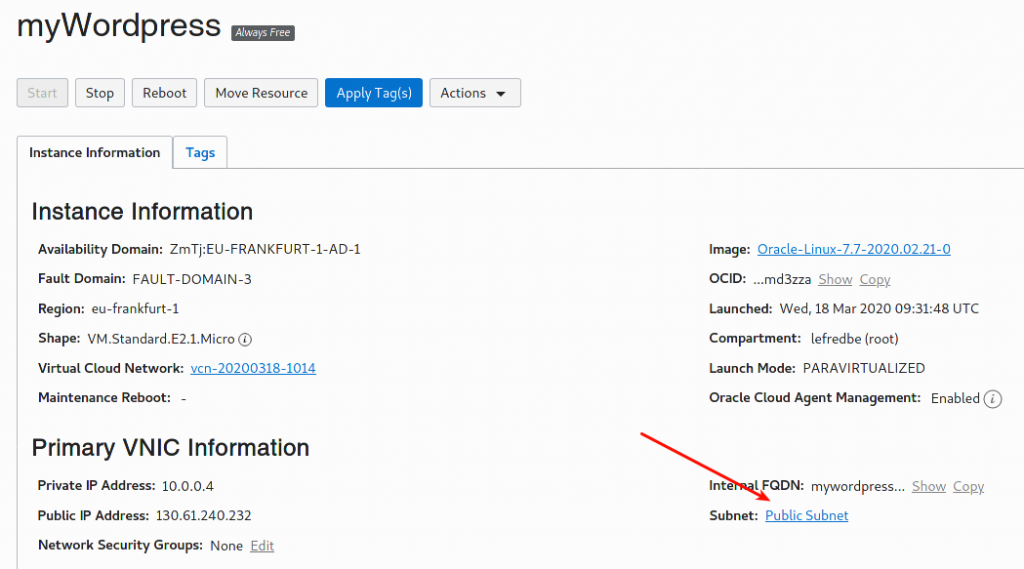
On the Instance’s Information Page, we click on the Public Subnet:
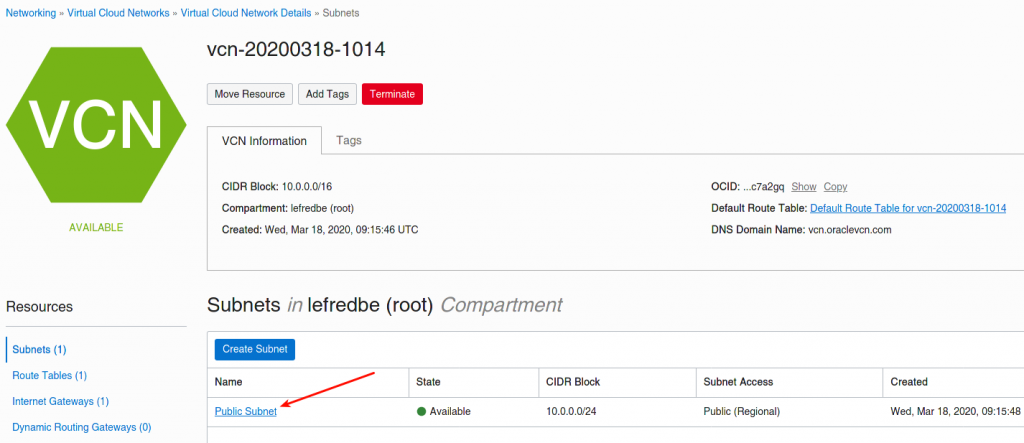
We reach the VCN’s page and we can click again on “Public Subnet”:
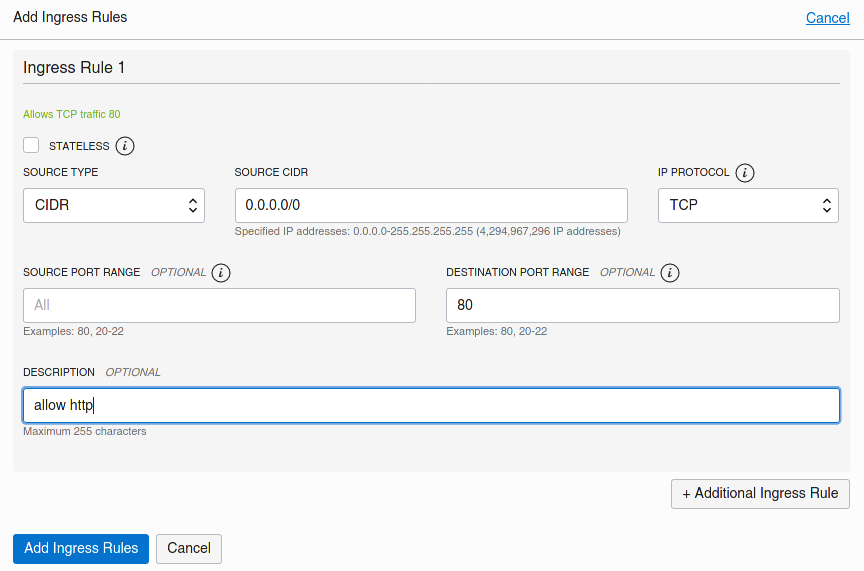
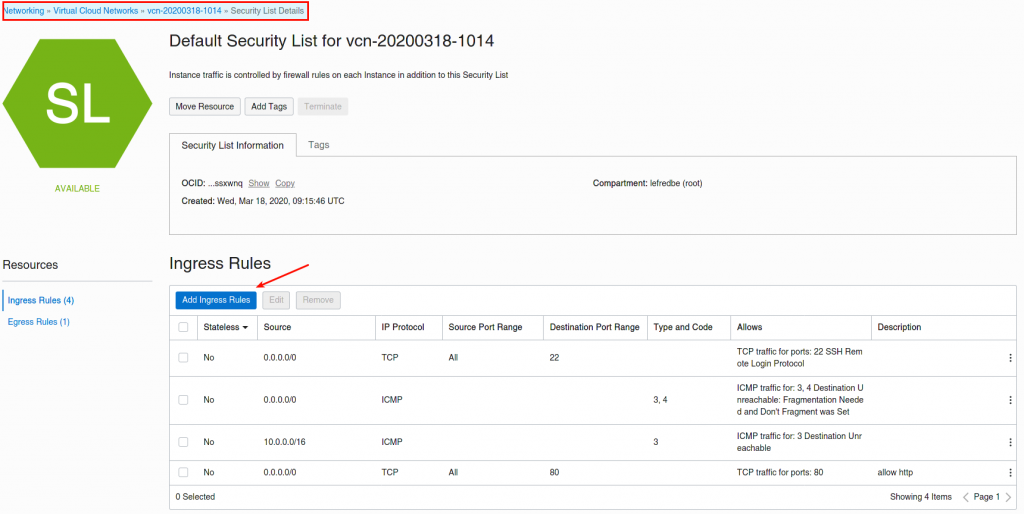
We are now in the Security Lists, we can only edit the existing one when using the Free Trier. Let’s do so and add an new Ingress Rules:
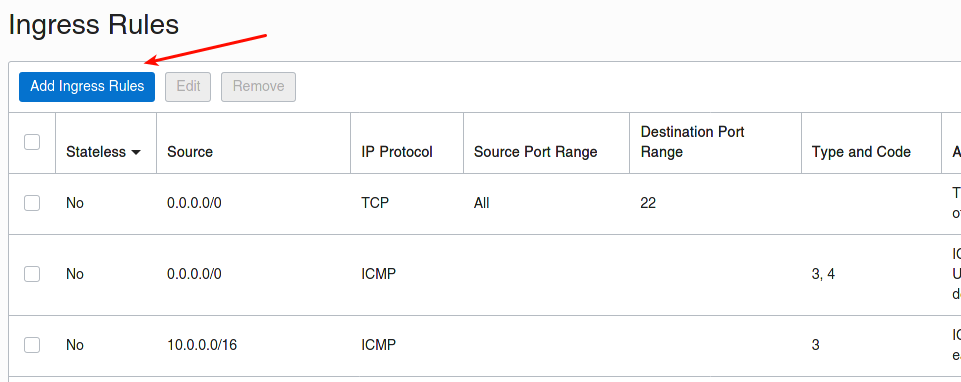
And we add the rule to allow the traffic from everywhere to the port 80:
Now let’s configure the local firewall too using the ssh connection:
[opc@mywordpress www]$ sudo firewall-cmd --zone=public --permanent --add-port=80/tcp
success
[opc@mywordpress www]$ sudo firewall-cmd --reload
success
We can start apache and try it:
[opc@mywordpress www]$ sudo systemctl start httpdJust put the public IP in your browser and you should see the following page:

Installing MySQL
The WordPress instance is ready, let’s setup the database now.
As we don’t want to connect directly to the MySQL Server, we will remove the plublic IP and use the WordPress server to jump on our MySQL instance.
Removing the public IP must be done only after installing all the required software as the server won’t be able to connect to Internet anymore and we can’t have a NAT Gateway with the Free Trier.
Installing MySQL Community Server
Now we can connect to our MySQL VM from the WordPress instance (or still publicly), but we must not forget to forward the ssh agent:
ssh -A -i ~/.ssh/id_rsa_oci opc@130.61.161.27Please note the
-A
And we can connect to our MySQL instance:
[opc@mywordpress ~]$ ssh 10.0.0.5
The authenticity of host '10.0.0.5 (10.0.0.5)' can't be established.
ECDSA key fingerprint is SHA256:/S2NAcn0LCFKqdXPubfD3MEYfaQ2abq8aFQmjx2h+E0.
ECDSA key fingerprint is MD5:d5:ee:fe:ae:42:ef:19:08:21:9c:71:fe:5d:72:43:f5.
Are you sure you want to continue connecting (yes/no)? yes
Warning: Permanently added '10.0.0.5' (ECDSA) to the list of known hosts.
[opc@mymysql ~]$
We have to install first the MySQL Repository also available on this page:
sudo yum install -y https://dev.mysql.com/get/mysql80-community-release-el7-3.noarch.rpmWhen done, it’s time to install MySQL 8.0 Server:
[opc@mymysql ~]$ sudo yum install mysql-community-serverThe next step is starting the MySQL Server and change the root password. We will also install MySQL Shell which is now the favorite client for MySQL:
[opc@mymysql ~]$ sudo systemctl start mysqld
[opc@mymysql ~]$ sudo grep assword /var/log/mysqld.log
2020-03-18T13:36:46.472644Z 5 [Note] [MY-010454] [Server] A temporary password is generated for root@localhost: 6Cxodla<O?;X
[opc@mymysql ~]$ sudo yum install mysql-shell
Prepare MySQL
We have the temporary initial password. We need to change it and we will create the wordpress schema and a dedicated user for WordPress:
[opc@mymysql ~]$ mysqlsh --sql root@localhost
Please provide the password for 'root@localhost': ************
Save password for 'root@localhost'? [Y]es/[N]o/Ne[v]er (default No):
Error during auto-completion cache update: You must reset your password using ALTER USER statement before executing this statement.
Error during auto-completion cache update: You must reset your password using ALTER USER statement before executing this statement.
MySQL Shell 8.0.19

Copyright (c) 2016, 2019, Oracle and/or its affiliates. All rights reserved.
Oracle is a registered trademark of Oracle Corporation and/or its affiliates.
Other names may be trademarks of their respective owners.

Type '\help' or '\?' for help; '\quit' to exit.
Creating a session to 'root@localhost'
Fetching schema names for autocompletion... Press ^C to stop.
Your MySQL connection id is 0 (X protocol)
No default schema selected; type \use <schema> to set one.
MySQL localhost:33060+ SQL > set password='MyBigPassw0rd!';
Query OK, 0 rows affected (0.0296 sec)
MySQL localhost:33060+ SQL > create database wordpress;
Query OK, 1 row affected (0.0057 sec)
MySQL localhost:33060+ SQL > create user wp identified by 'MyPassw0rd!';
Query OK, 0 rows affected (0.0072 sec)
MySQL localhost:33060+ SQL > grant all privileges on wordpress.* to wp;
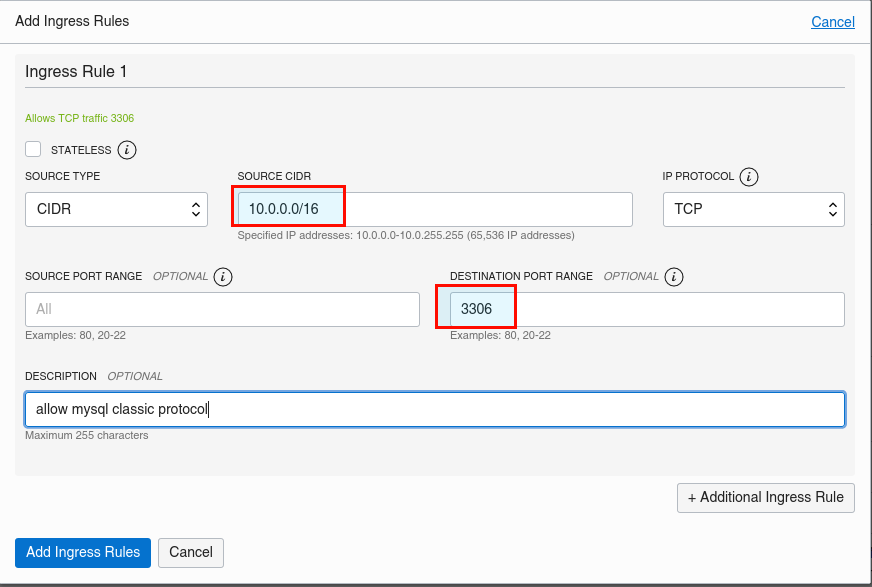
Query OK, 0 rows affected (0.0065 sec)We have to allow connection to the MySQL port (3306) locally on the instance and then on OCI:
[opc@mymysql ~]$ sudo firewall-cmd --zone=public --permanent --add-port=3306/tcp
success
[opc@mymysql ~]$ sudo firewall-cmd --reload
success
We go back in the VCN Details page on OCI’s dashboard and we add the following ingress rule:
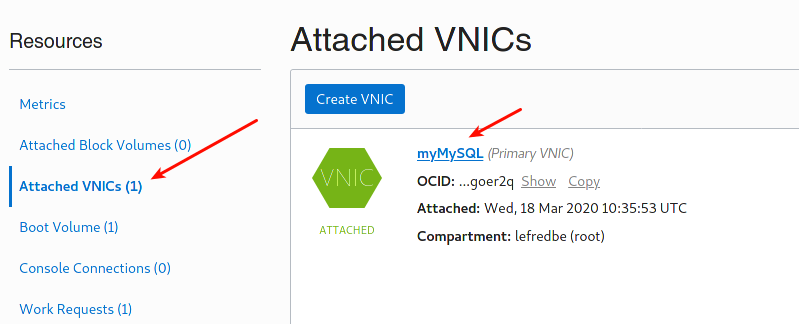
Removing the Public IP
We can now remove the Public IP. On the Instance Details page, we click on “Attached VNICs” and on the “Primary VNIC” (there should be only one):
Then we click on “IP Addresses”:
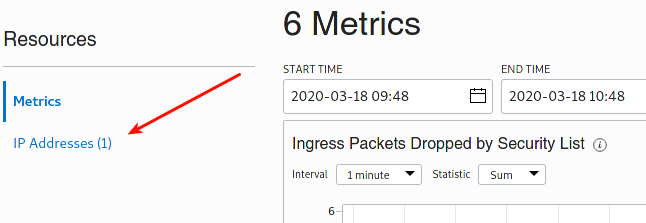
And we edit it and remove the assigned public IP (don’t waste them):

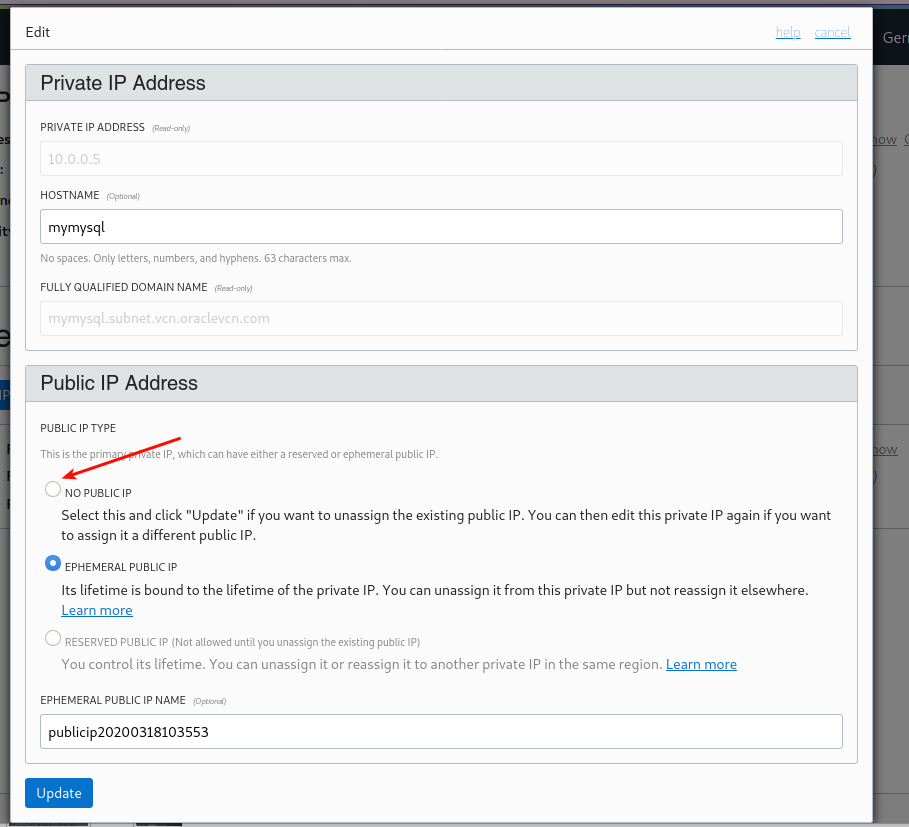
Perfect !
Finishing WordPress Setup
We can now go back in the browser to finish WordPress installation:
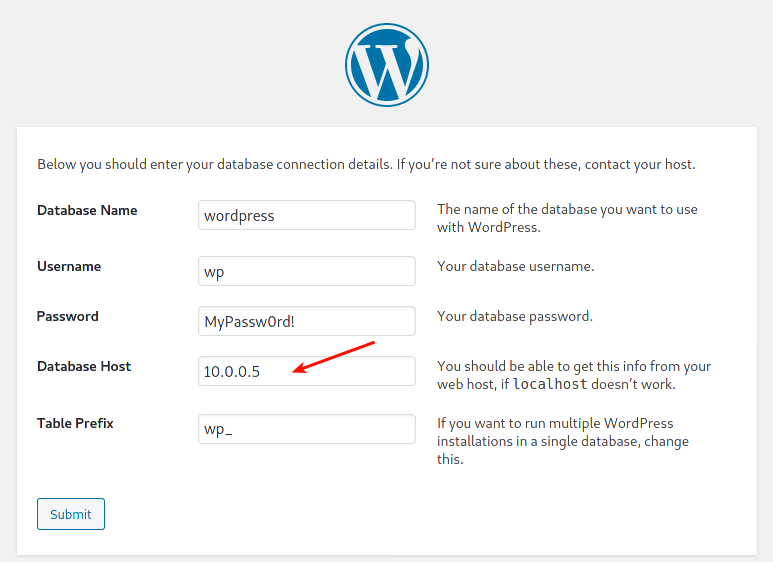
But when you will click Submit you will see again an error…
This is because of SELinux. You can disable it completely or allow Apache to connect to MySQL:
sudo setsebool -P httpd_can_network_connect_db 1
Please refresh and you will be able to continue the setup of WordPress and have your first WordPress site in OCI ! Congrats !
You can see this process also in video: